1. Once you have registered and configured your site, you can create the GTM code in the Site Settings. This code must be implemented on your website as per the guidelines in the Settings and our email instructions.
It’s essential to install the GTM code on every page of your website. Without this code, tracking and analyzing site visits for future blocking will not be possible.
The GTM code can be incorporated into any CMS that allows for code insertion. This is applicable to most CMS platforms. We have provided guides for the top three CMS platforms:
For WordPress, there’s also an option to install through the Google Tag Manager for WordPress plugin. The steps are outlined below:

Proceed to the Plugin Settings:

Then choose the following settings. Note that you should replace GTM-XXXXXXXXXX with the GTM container identifier provided in our email. The complete GTM scripts are sent via email, but you only need to use GTM-XXXXXXXX from it and enter it in the Google Tag Manager ID field, as illustrated in the screenshot below:

Once these settings are configured, data will begin transmitting to us within 30 minutes.
Preferably, place our code above Yandex.Metrica and Google Analytics.
Ensure to add the code to all your website pages. We analyze numerous bot behavior aspects, like page transitions and mouse movements, to prevent future unauthorized access. If some pages are not analyzed, the protection algorithm might not function efficiently on your site.
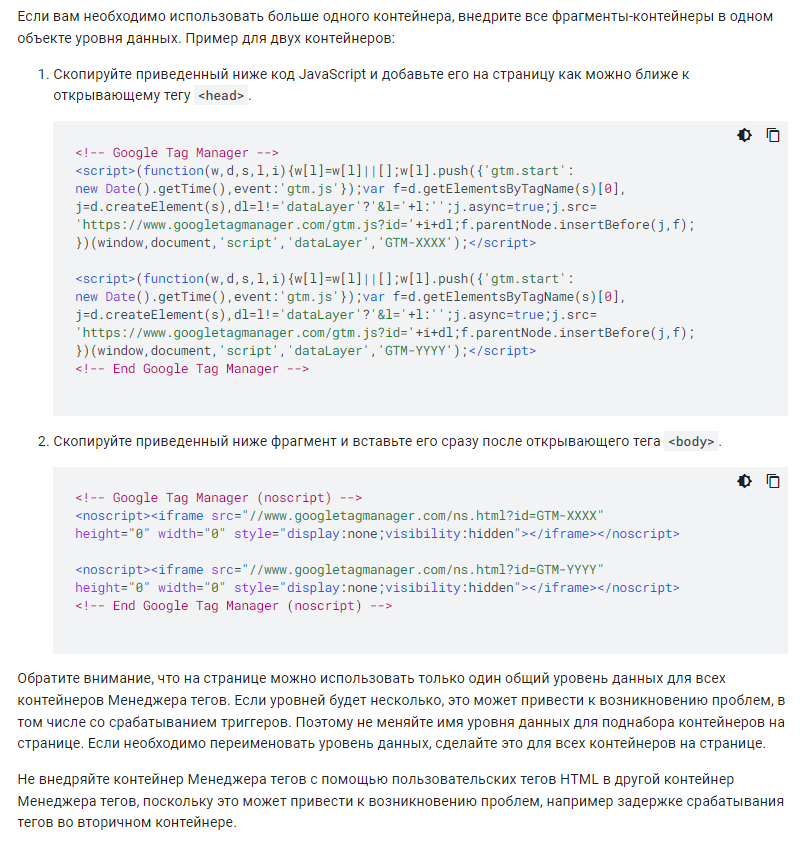
If there’s already a GTM code on your page, add ours as per the official guidelines – https://developers.google.com/tag-manager/devguide#multiple-containers
After installing the GTM code on your site, verify its accuracy in our dashboard on the main page.
Important: Some platforms like Flexbe may have unique characteristics that could hinder our program’s functionality. If issues arise post-GTM code implementation, please reach out to our support team on our website.